Kitchen Planning

Once the interior and exterior wall framing is finished I like to take final measurements and meet with the kitchen designer to work on specific layout details.  In the case of my current project, I had some ideas on how I wanted the layout to work and positioned the walls in such a way as to make my fridge and pantry unit fit properly.

Once the software comes into play I get a much better idea of the final look of the cabinets.  Once I commit to a cabinet layout I select the various fixtures, generally starting with the flooring, then cabinet door material, countertop, and finally tile. 

This is the current draft of my kitchen, showing the window location and where the ceiling height changes to 10ft.  Overall this is a very practical and european style kitchen. I am pretty sure the eventual buyers of this home will be pleased with the selections.


With a cabinet shop selected we can make the drawings necessary for all the cabinets to be manufactured.  We need to make sure the details work, like the fridge doors can swing without obstruction, and the island fits with the location of our s…

With a cabinet shop selected we can make the drawings necessary for all the cabinets to be manufactured.  We need to make sure the details work, like the fridge doors can swing without obstruction, and the island fits with the location of our stairs.  This design is nearly complete.

How I Cost Another Builder $25000 in a Flawed Bidding War (and how to avoid this in the future)

A nice (location, aspect, zoning, position in block), yet suboptimal (size) Killarney development site was listed last week and I wanted to purchase it. So did the other builders who specialize in small multifamily projects, some of whom I know as I monitor their projects and we chat occasionally. 

The listing agent was trying to get a bidding war going by withholding offers until Sunday night. This is a trick (not going to legitimize it here by calling it a strategy) used by the realtors to get more money from the builders.  The listing agent gets to know who the offers are coming from and for what amount. The bidders have zero information and take real risks of overpaying based on false information or rumours.  I found out Monday morning that this is exactly what happened.  

I felt the asking price was too much, basically $100,000 more than I recently purchased a comparable lot for (even an arguably better and larger lot). My investing partner was willing to pay up to the $530000 level for the lot so we put that bid in just before the deadline. Unfortunately another builder found out our offer had come in so late and guessed wrongly it was high.  He raised his bid to $575000 from $550000 (a number high enough for the sellers to agree), basically he was now competing against himself to buy the property.  

Obviously the sellers were happy that our near market price offer came in and they leveraged that into getting an extra $25000 over the market value.  This experience has taught me a lot about these phony bidding situation, such as not to get involved, or if you must get involved, find out the other sellers and coordinate offers with them. The realtors are controlling land sales too much and any tactic to undermine that control would be an improvement to the process.  Next time I'm going to make some phone calls and see if we can save some money.  All the builder competition does is shrink already small margins on potentially risky projects.  Adding additional offers that are below asking price will likely drive up the neighbourhood land value and this could harm future deals for everyone.

In the highly speculative market we have now, land prices are way up but the new builds are selling slowly and at a discount.  The builder valuations were estimated when the project was planned (sometimes years earlier) but these prices are not being realized.  It makes no sense to overpay for land now with the expectation that market optimism related to the Trump election and pipeline approvals will improve the market for new homes in 2018.  This optimism could easily dissipate and the pipeline work may not bring meaningful benefits for the Calgary housing market.  This could create a nasty scenario where those builders overpaying for land now are squeezed if the market drops again as it did in all of 2015-16 where builders were working on land purchased at the 2014 peak.  

The good news is the City is finally making some more supply available through the rezoning process.  The key to getting a reasonable deal on land now may be to work on those new areas that have yet to see any multi family building.  This is where I will be focussed.


IMG_3807.PNG

This is the sale notice.  By the time this came out I had already called another builder and told him what I had bid and why.  His reply was ' I bought it '.  He wasn't particularly pleased that my lower offer had compelled him to overpay.  

Precast stair complete

Having the precast stair installed as early as possible in the process makes a lot of sense to me, especially given the alternative is to use some kind of ramp.  Safe entry to a job site becomes more important as the number of risers increases, but even this job, with just an easy two rise, benefits greatly from early install.

Here is a lengthy but likely not comprehensive list of the benefits of early install of a precast stair at the job site

  1. Safer access - in any season, but especially winter, a ramp can get very slippery.  there are many hazards already on a job site so this eliminates a big one
  2. Inspector friendly - city inspectors may not enter the project to inspect it without a safe entry in place.  Why bother building a ramp and putting handrails on it when you can just have the precast installed weeks earlier?
  3. Deliveries - it is much easier to delivery everything from lumber to pipe if the stairs and landing are in place.  the precast will assist every trade from start to finish with getting tools and material in and out
  4. Exterior finishing - the stairs need to be in before exterior work such as stucco or siding goes on.  This way the flashing can be done more accurately around the precast.  
  5. Cleaner project - less mud will get tracked into the house
  6. Sidewalk planning - once installed the front grades and requirement for the sidewalk is easier to visualize and the precast also needs to be in place before formwork on the stairs can begin


The precast is installed in just a few minutes from a specialized crane on the back of the truck.  We selected a simple broom finish two step unit.  These cost around $1500 to supply and install, much easier than a wood system, and no main…

The precast is installed in just a few minutes from a specialized crane on the back of the truck.  We selected a simple broom finish two step unit.  These cost around $1500 to supply and install, much easier than a wood system, and no maintenance required.

Slab Pour

We had the heaters running overnight and the interiors of the basement warmed enough to melt any frost in the ground. The huge icicles on the sides of the concrete walls from snowmelt in the framed areas above also thawed and evaporated.  Right now the air temperature is sitting at a balmy 6 celsius, however in the basement it would be freezing without heat, not a place for wet concrete to cure properly.

The heater was a timely installation because we had concrete and a placing crew arrive at 8 am to pour the slabs.  Use of a pump truck allows much easier placing of the mix into the far corners of the basement.  Once set up, the concrete is power troweled and left to cure.  Here are a few pictures from the work on site this morning.

1. Mix is being poured into the pump

2. Crew is placing the concrete 

3. wet mix is left until it can be finished with the power trowel

Basement Slab Prep

Yesterday the plumbing inspector arrived on site to look at the basement plumbing rough in.  With his approval of the drainage work, we can now prepare the basement slab for the concrete pour.  The first step is to connect the weeping tile under the footing into the sump basin, and then spread gravel to the top of footing, compact it, and lay a poly vapour barrier and rebar on top of that.  The back flow valve is boxed in so that it can be accessed later (it forms sort of a cleanup in addition to flood or sewer backup protection).

This is another example of how winter conditions are going to cost a lot of money that would not be needed if we were operating in warmer season.  While the air temperature is above zero during the day, the basement is very frozen and not likely to thaw any time soon.  We will be renting heaters to warm the area before the pour, and keep it warm until the concrete has a few days to cure.  I am making another big attempt to stay ahead of my other crews, and this cannot be done without a big management push.  The early slab pour will pay off once the trades begin work, because we will have the basement framed.  Here are some of the many advantages of having the slab done before framing is done.

1 - Framers don't leave and start another project (possibly never to return).  Once the roof is done the framers move into the basement and frame the frost walls and partition walls

2 - The HVAC work is much easier - the furnace can be placed on the slab, rather than hung.  All of the duct work is much easier working on a flat slab rather than a rough dirt surface.  Most tin installation is in the subfloor accessible only by the basement

3 - plumbing work can be done for the basement bathroom and bar

4 - the electricians can hang the panel more neatly and wire the basement along with the upper floors.  Once again this saves time over having the electricians come back later

All of the prep work done now allows the basement to be finished very smoothly, rather than have it treated as a separate project.  I have yet to mention #5, possibly the biggest mess maker of all the trades...

5 - The drywall and taping can be done all at the same time so the mess, dust, scraps, and headaches of drywall finishing is only done once rather than twice. This in itself is worth early slab prep efforts.

Hopefully we can get this basement warmed up and poured quickly and make the above 5 items a reality.

Here are some photos of the various stages of the slab preparation. First the weeping tile is connected, second the gravel is placed, third the tamping machine is hauled away (note this is another example of why it is critical to have the stairs installed before the basement work begins), and finally the poly and rebar is installed over the gravel.  


Roof Installation Underway

The framers have installed about half the trusses by the end of the workday today.  With the crane booked again for tomorrow afternoon they should be able to have the rest of the trusses on by the weekend.

Note the middle truss is doubled and both sides are covered in a layer of 5/8 drywall. This is a continuation of the fire protection to reduce the likelihood of fire spread between the houses.  


One Piece Shower/Tub Units

Use of one piece shower/tubs allows for an economical product for secondary bathrooms.  These tub showers are large and often impossible to carry upstairs.  For this reason we usually try and deliver them to site just before the crane arrives to lift the roof trusses.  For the master bathroom we tend to use fully tiled walls and bases.  Here is a series of photos from today of a tub shower being lifted by the crane and placed into the second bathroom upstairs.

Plumbing begins

I booked the plumber to get going on the basement plumbing so we can inspect it and have authorization to pour the Slab.  

Half a day was all it took to get the pipe work roughed in.  It is extremely helpful to have someone who knows the code to do the tricky parts.  Since I don't know any code I was used as the gravel mover.  The next job is chipping out the solid rock ground and getting the sump basin in.  This is one of the worst jobs in construction that I also tend to inherit.  


IMG_3762.JPG

Here is the happy plumber finishing the first basement rough in  

Roof Material

With all the truss and lumber package now sitting safely in the front yard the framers can safely commit to hiring the crane.  

Roof assembly should begin Monday.  We will use the opportunity to borrow the crane again to hoist our bathtub units.  These don't really move well up the stairs plus they are awkward to pick up by hand. 


IMG_3757.JPG

Frustrating legal matters related to land deals

One would think that when you write a cheque to pay for the entire purchase price of a house and hand it to your lawyer that the deal is going to be irrevocably closed and you will never have to worry about title problems or issues related to the ex-owner.

This is not always the case.  One of my properties supposedly clear title has been troubled now twice as if it is haunted by the previous owner.  In the first instance the ex-owners ex-wife was carrying a bunch of unsecured debt that she undoubtedly was defaulting on.  Her banker decided to apply a writ to the title of my property.  Thanks to the sellers lawyer being so slow in clearing the ex-owners names off the title the bank was able to get what appeared to be a sizeable lien on my property.

When I received this letter from the land titles office I was suitably aggravated and my first call was to my real estate lawyer.  Fortunately my lawyer at the Urban Law Group is Zac, an old friend of mine from elementary-high school and I know his cell number so I can get in touch with him quick.  He had a nasty letter drafted up to the lawyer of the bank who put the illegitimate writ on my house and they acted to remove it.

Since the sellers lawyer has not done his job to clear the title of its old financing, these old mortgages linger on the title in a way that continues to frustrate me.  In the past five months, the sellers lawyer has had to do this work, it seems reasonable to expect they would be able to comply. 

My bank is preparing to assist me with some financing for my next project, and guess what the last of many hurdles I need to overcome is?  That's right, the title looks terrible due to all the old mortgages appearing as if they are in place on the title.  I look foolish with my banks credit department after telling them the property was unencumbered, and now we have to chase the sellers law firm to get them to do their job (that they were paid to do in August).  Here is a heavily redacted version of the letter sent yesterday to the other law firm.  Lets hope they move quickly on dealing with their responsibility regarding this matter (and I can proceed to get my project financing in place).


Note the lawyers still use fax to communicate.  Maybe fax is the best way to get paperwork over to the law office.

Note the lawyers still use fax to communicate.  Maybe fax is the best way to get paperwork over to the law office.

Electrical and Gas Servicing - critical steps of the project set the stage for success later

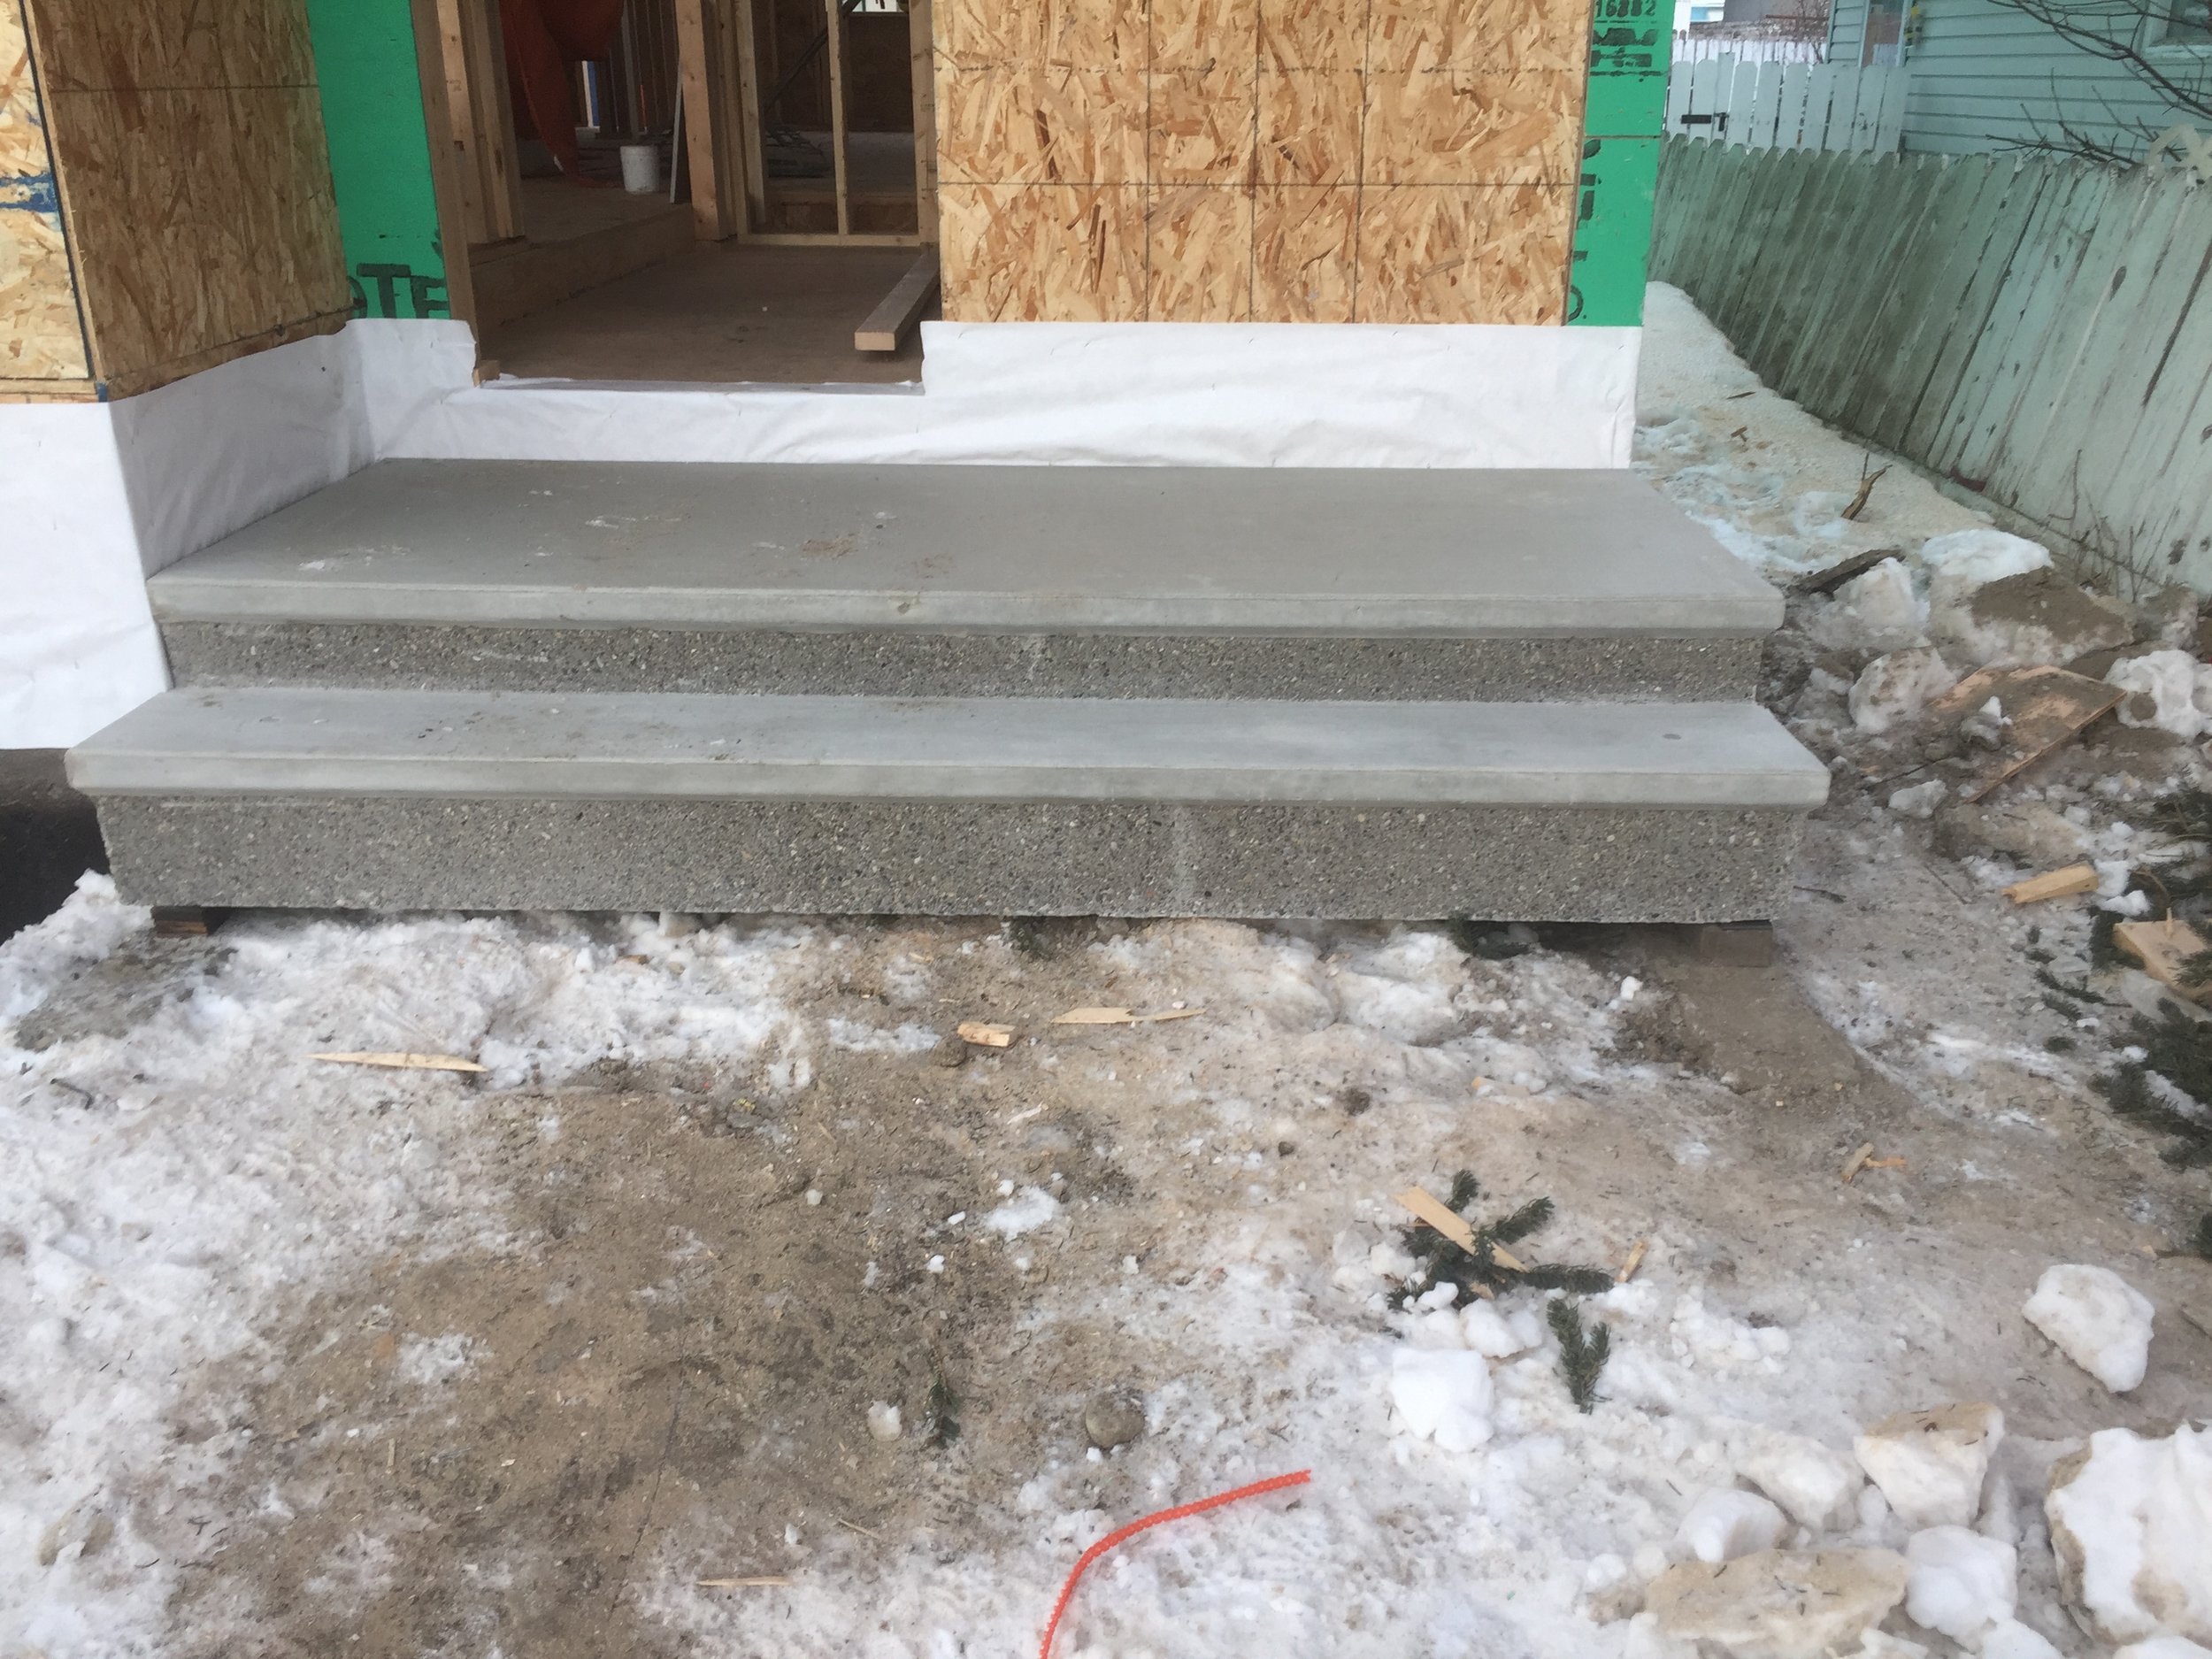
Some of the most critical and most difficult work that must be done when building in established areas is connecting the new utility services to  the existing infrastructure.  Unlike in a new subdivision, this must be done among the occupied homes surrounding the subject property.

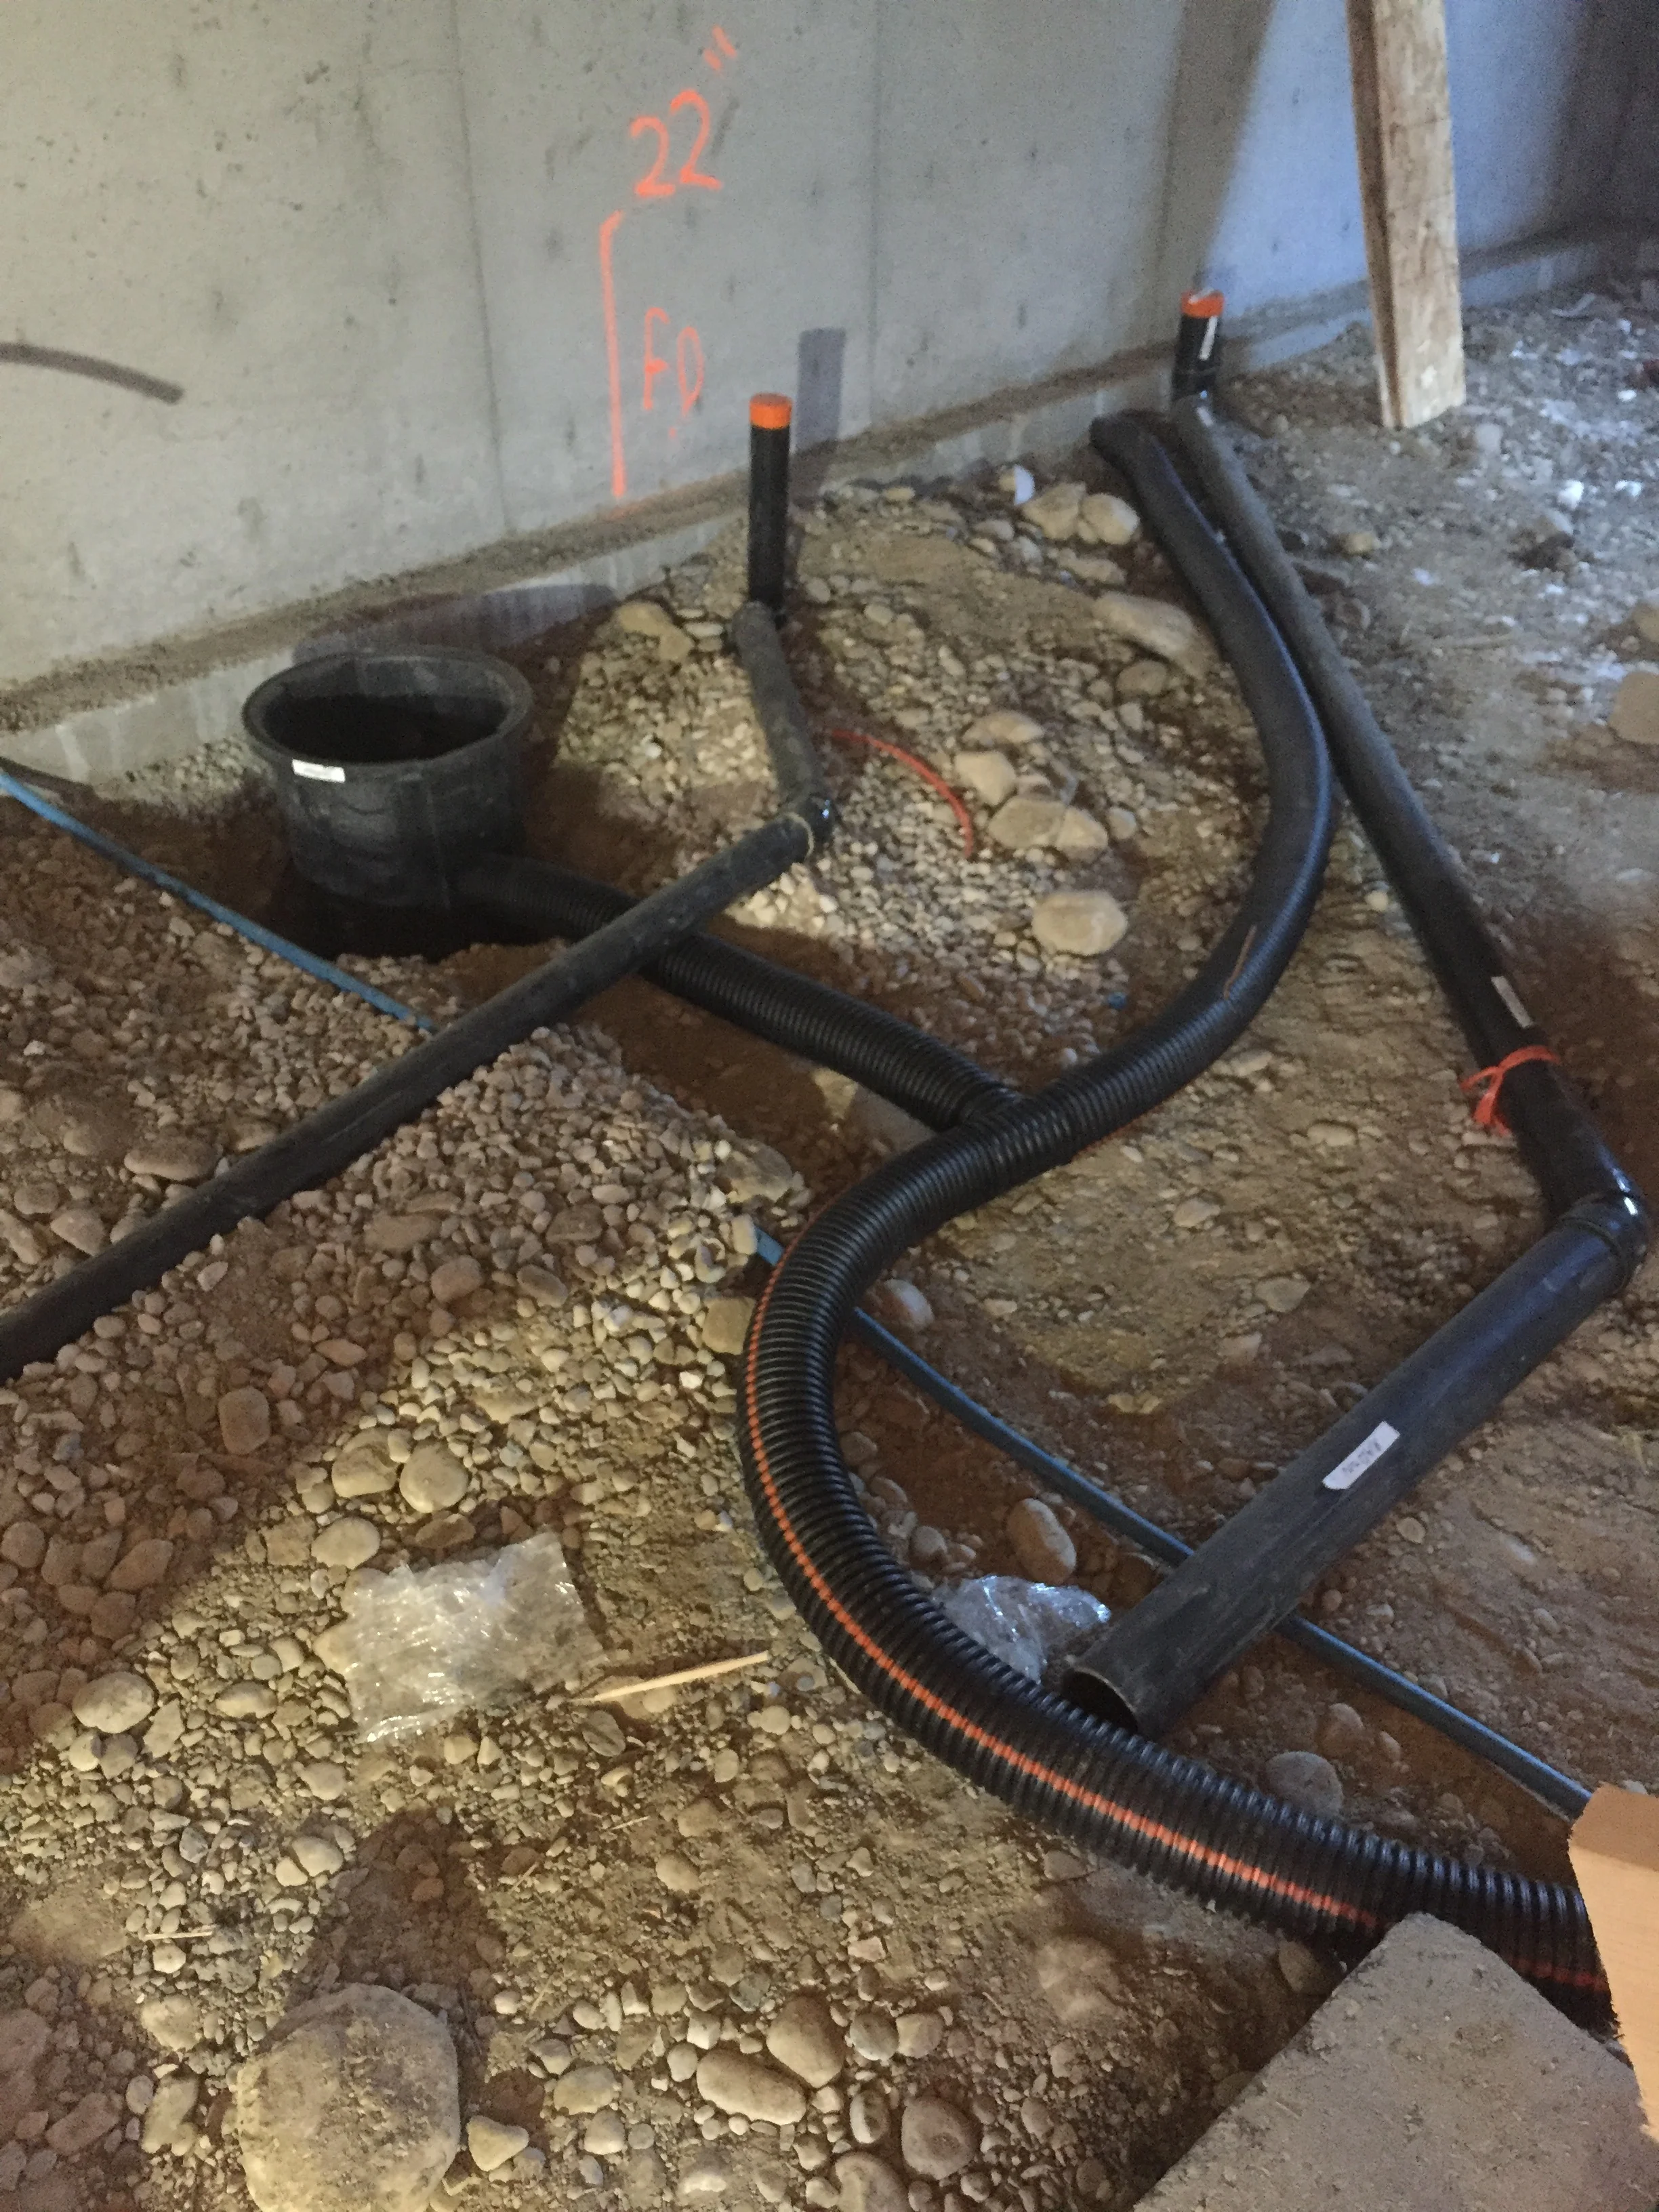
We have already shown in detail how the sewer and water lines are connected at the front of the property beneath the city street. With this complete, we now must tackle the remaining utilities, gas and electricity.  With a typical laned property in the inner city, electricity tends to be overhead in the alley, and natural gas is buried in the alley.  Today we managed the underground portion of these installs.

Where this can get complicated is trenching and sharing of the service corridors.  While the electricity is high overhead in the alley, common practice is to connect the overhead to the garage, and then run it underground in conduit to the house.  Power is then run back to the garage in the same trench after the panel. This means multiple conduits are needed, plus the communications wires need their own conduit as well.  The gas line needs to be run fully underground from the alley to the back of the house where the gas meter is located.  

Staging of the gas and electrical underground work becomes critical at this point.  Once the gas is connected, it cannot be safely operated on top of.  So what needs to be avoided is having to re-trench above the gas line to put the electrical in.  The obvious solution is to use the common trench and lay conduit for the electrical while the gas is going in.  

This is a critical step because the builder only has one opportunity to do this.  He must be available immediately as the trenching begins to have the electrician on site when the gas company starts work.  The gas company uses its own contractor and has no obligation to collaborate with the builder and his trades.  If the builder doesn't coordinate this work this will create a huge amount of trouble later because the electricians contract always says 'trench by others'.  It would become the builder's responsibility to dig a second trench on top of the live gas line.  This could mean a huge amount of hand digging and is not a good use of anyones time or budget.

All of this service work is eventually buried, largely invisible, and must be very boring to the casual observer, yet it is so critical to the project.  You could argue this is some of the most important work that is done to make a house livable. Even the fanciest mansion would be uninhabitable without taking care of the utility services.  We pride ourselves on getting this done properly and in a professional manner.  A good way to evaluate a home builder would be to investigate how quickly and effectively he or she manages the servicing of a project.  There are considerable lead times, planning steps and documentation requirements that all must be done long before the underground work begins.  I have done  all this so we are ready to go on getting the work done.

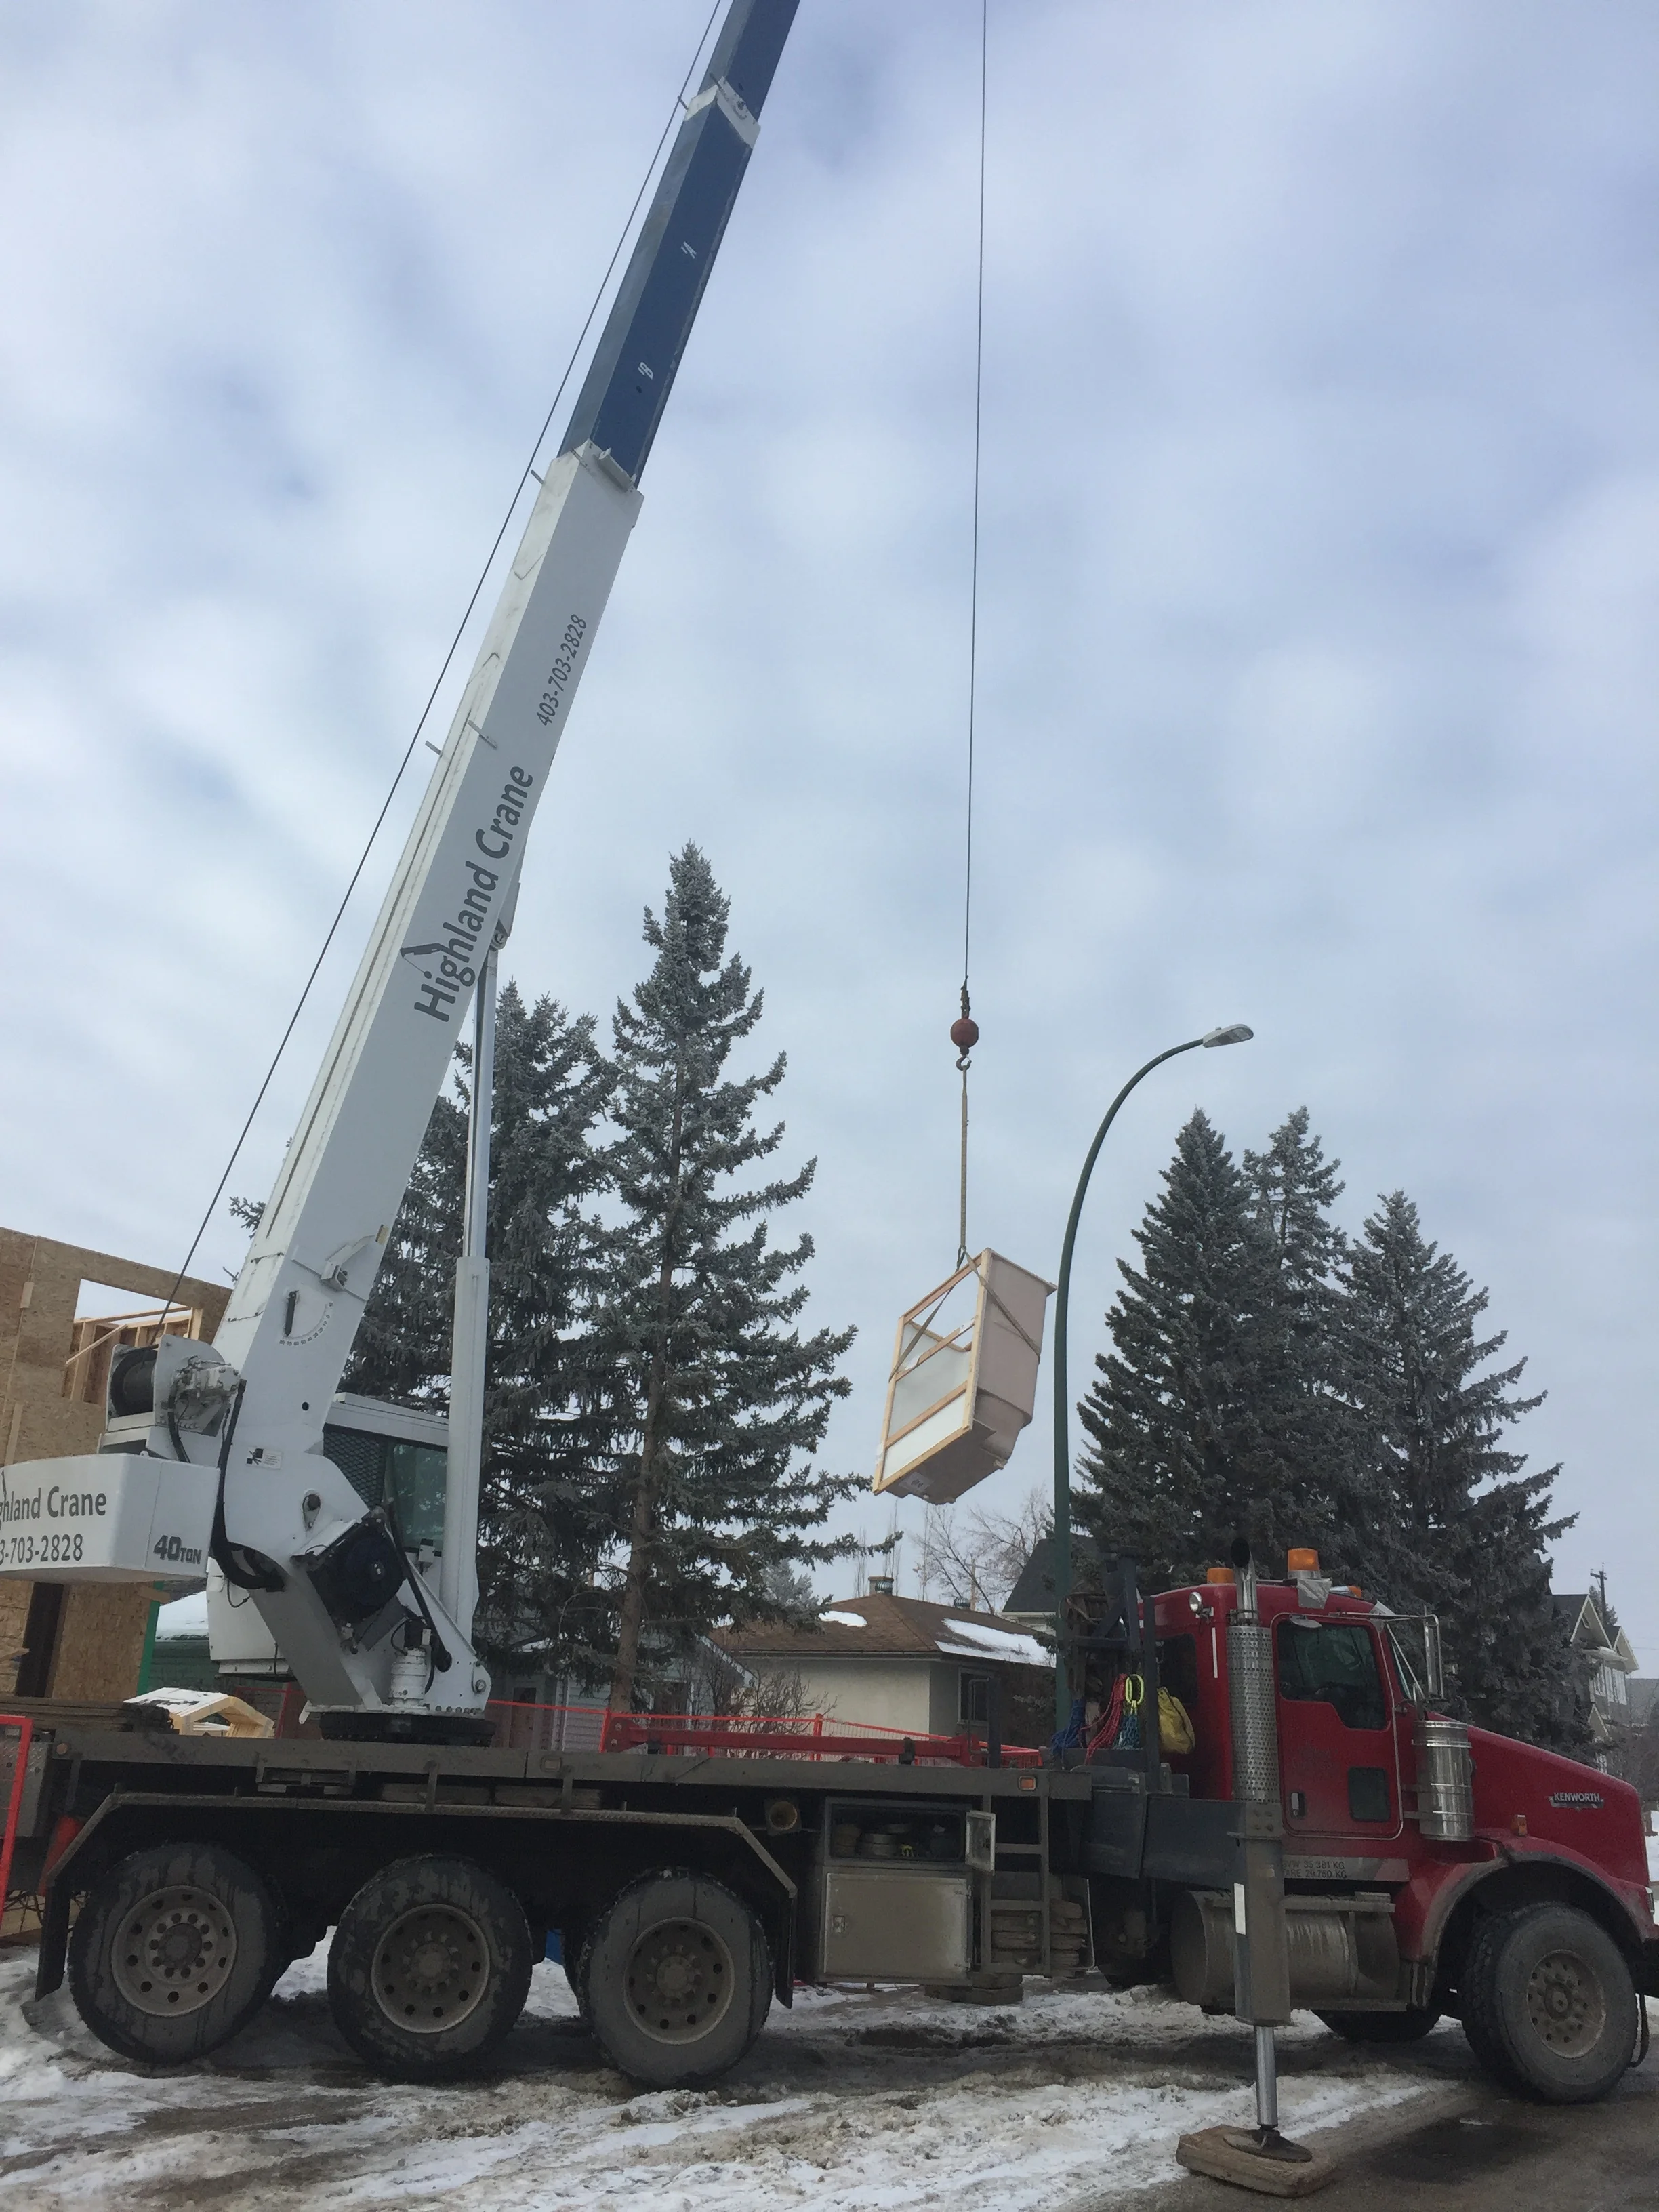
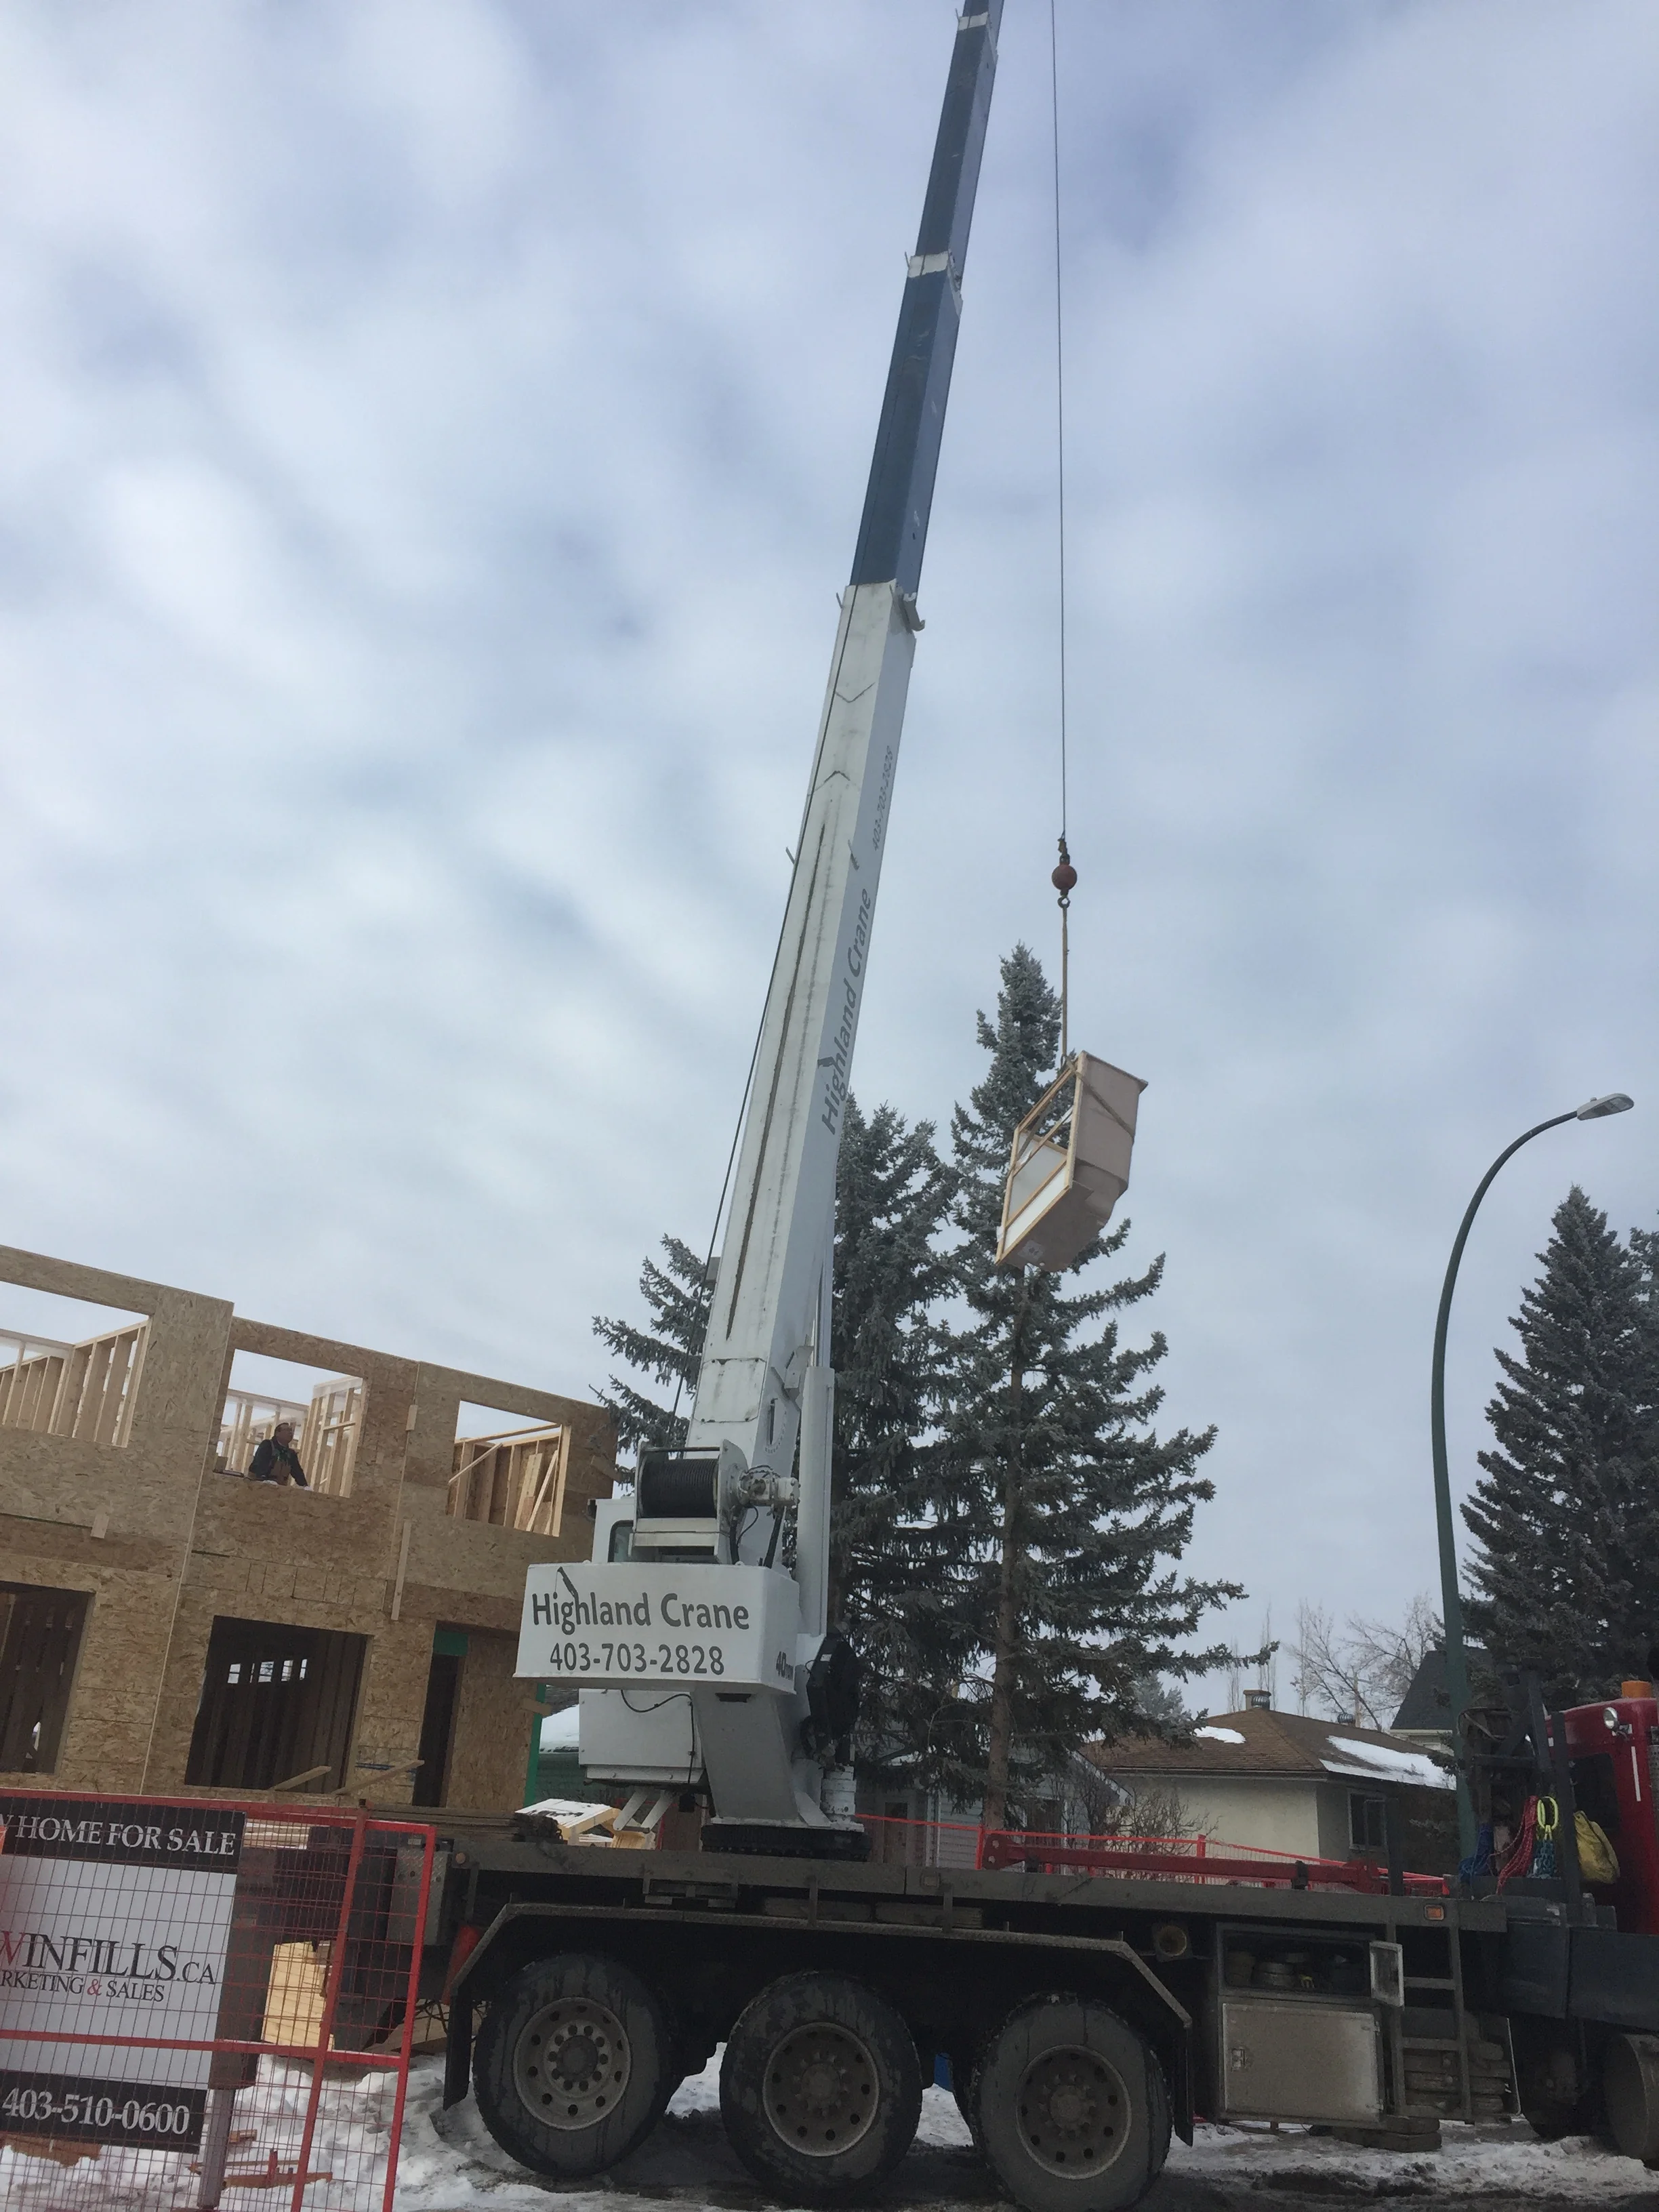
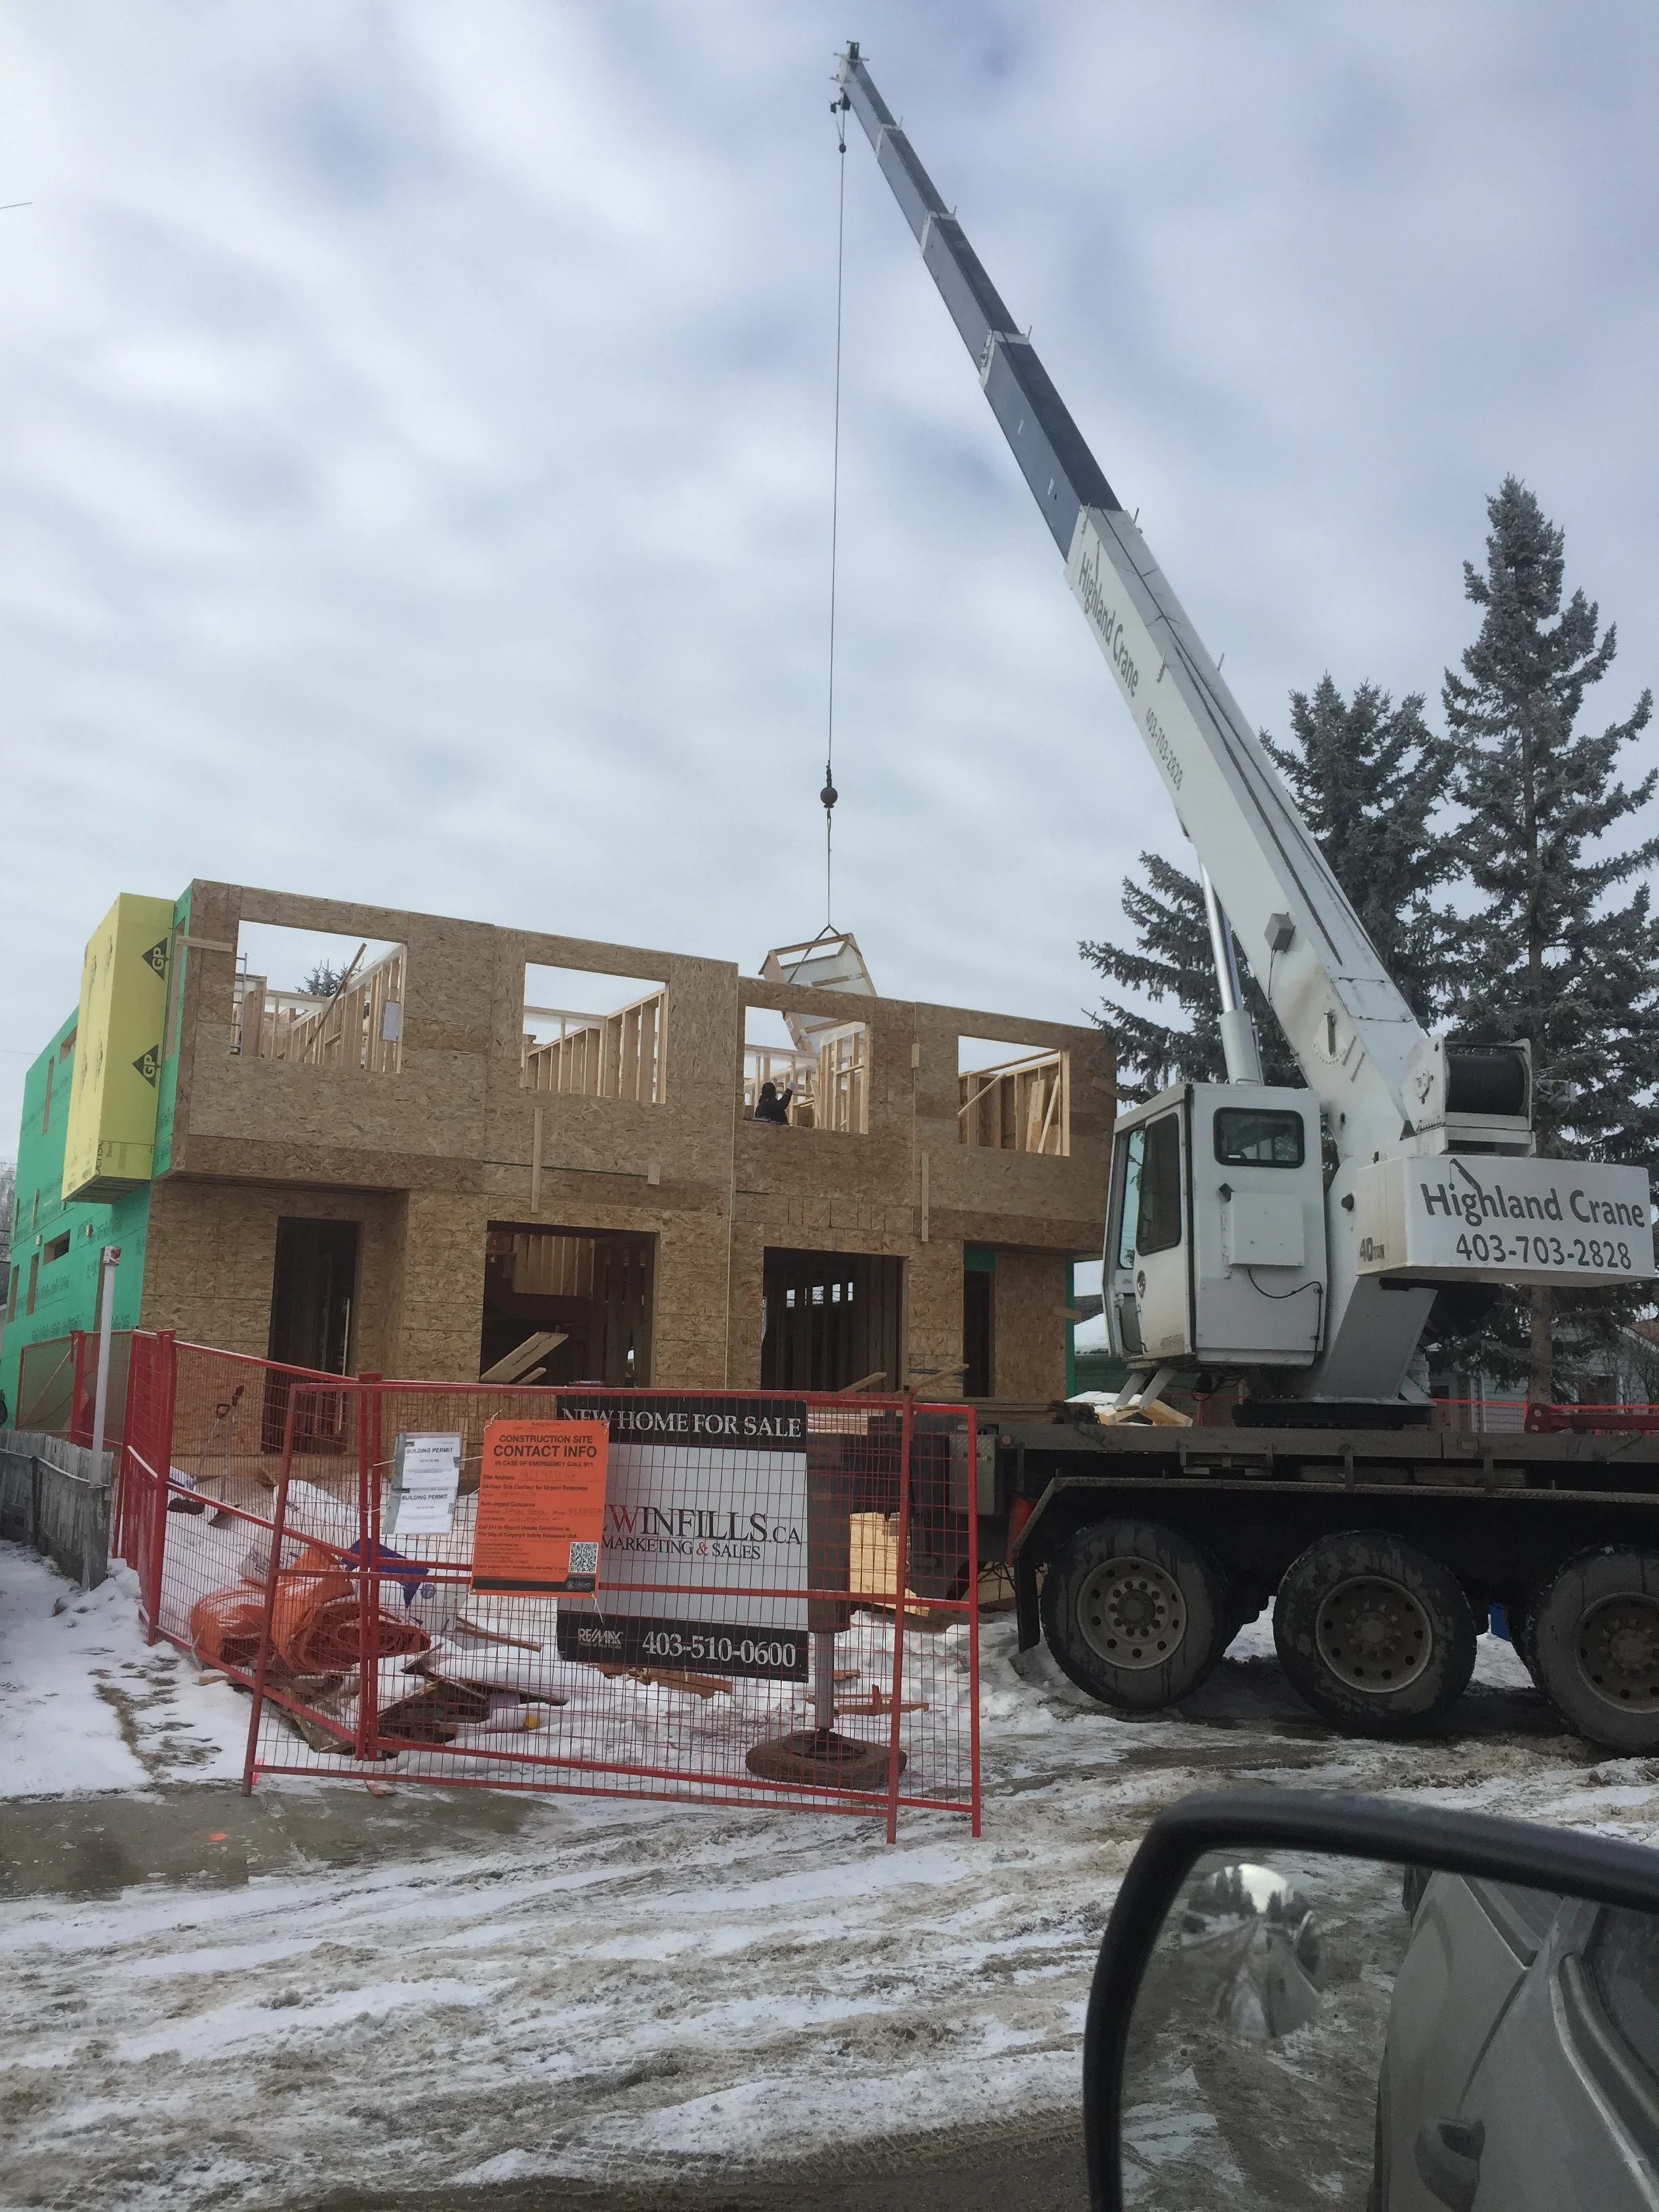
At this stage in the process (we are framing the second floor), we now have sewer and water hooked up, gas run to the riser at the houses (meter comes later), and conduit laid so the electrical service can be made to the houses once the garage is built in the spring.  This has involved three subcontractors, multiple permits, inspections, and excavations, closing the street and alley, thawing frost, mobilizing machines, clearing the yards of construction material, and over $20k in expenditures.  

The service hookups set us up for success later.  For example, we need a lot of water to mix stucco, drywall compound, and adhesive for tile.  We need heat to dry the drywall compound once taping is done, and to lay tile, so we must be able to run the furnace (gas and electricity), and drain condensate from the furnace (sewer).  Once the houses are wired, we need temporary circuits for tools and lights, and to run the furnace fan.  Without these being taken care of by the builder, the trades will show up to a dark, cold house and refuse to start work.  Possibly this is not a problem in the summer, but in winter not having the utilities ready is a scheduling fiasco.  At this point I am confident I will be able to get the furnace running and the lights turned on well before drywall begins.  All of the finishing trades will be provided the essentials to allow them to work effectively.  Nothing generates complaints faster than a shortage of heat and lights at the job site.  I have found that the sooner these issues can be dealt with the better for all involved.


Gas line is the yellow pipe. It will be connected to the gas main tomorrow in the alley.  The grey conduit is empty and ready for wire that will come later.  We have to have the garage built so there is some where to moon the meter.  …

Gas line is the yellow pipe. It will be connected to the gas main tomorrow in the alley.  The grey conduit is empty and ready for wire that will come later.  We have to have the garage built so there is some where to moon the meter.  We must build the garage later not just because of frost in the ground but also we need the space for waste bins, machines, and framing material.  

Not having to hand dig this trench is a huge relief for everyone involved.  The machine time is provided by the gas company, only they are allowed to work in the alley due to the extreme hazard.  They cooperated with us as we ran out of co…

Not having to hand dig this trench is a huge relief for everyone involved.  The machine time is provided by the gas company, only they are allowed to work in the alley due to the extreme hazard.  They cooperated with us as we ran out of conduit and had to run to the hardware store. 

All backfilled the conduit risers are stickup up well above the surface, lets hope they don't get destroyed before we are ready to do build the garage.  The work is now basically invisible, but having a furnace to warm the house once the drywal…

All backfilled the conduit risers are stickup up well above the surface, lets hope they don't get destroyed before we are ready to do build the garage.  The work is now basically invisible, but having a furnace to warm the house once the drywall is done is a major project milestone.

Stair install

No crane pictures from today as it all happened early but as promised the stairs were hung.   


The heavy upper section is hung and braced at the middle wall

The heavy upper section is hung and braced at the middle wall

Here are some photos of how we will leave the stairs until the finishing stage. Purchasing these stairs early in the job is a good way to avoid the frustration of temporary sets that never work well and unsafe ladders.  All of the remaining trades can now work efficiently and safely. 


Lowers just set in place.  

Lowers just set in place.  

Looking down. The basement stairs should go in next and the stairwell can be used to access the lower level.  This is good because we have basement groundwork to do soon.  

Looking down. The basement stairs should go in next and the stairwell can be used to access the lower level.  This is good because we have basement groundwork to do soon.  

Downtown Views

When building in the inner city, you can sometimes enjoy a partial view from the upper floor.  The land slopes toward the river valley, and the downtown core is all in the valley, so it does not take much height to get a nice city view.  If the neighbours are all older bungalows then the view is usually clear above the roofline.  With the floor just installed I had a chance to climb the ladder and take a look from the top.  Looks good!


Looking east over the neighbours rooftop, a clear view of the Calgary skyline.

Looking east over the neighbours rooftop, a clear view of the Calgary skyline.

Cantilever framing

The framers were at work again today prepping the second floor for so the lumber can be hoisted by the crane tomorrow.  The detail they were finishing was the second floor cantilever.  A cantilever generally protrudes out of the side of the building into the four foot setback area.  

The reason the side cantilever is only allowed on the second floor is to make sure there is room for fire or emergency access down the side yard.  Or at least I think this is the reason, I've never read an official version.  Regardless of the policy on cantilevers they require additional fire rating, and can be tricky to build.  They add cost in terms of framing time, fire rating material, engineering, and spray foaming.  The bottom of the cantilever needs to be spray foamed as that is the only way to really ensure it wont be a cold spot in the upper bedroom.  It also has to be strong enough to carry some weight of the roof.  A sagging cantilever would be a framing disaster we'd like to avoid.

It is debatable if the side cantilever is truly necessary. They are almost always featured on the inner city duplex because the houses are slightly too narrow at 21 ft wide to allow for two good sized second and third bedrooms. The cantilever seems to add just enough extra space to make the layout work.  Without the cantilever we have found that bedroom furniture can fit poorly.  

The detail we like to use is to notch the joists so that the top chord remains continuous where it passes over the wall.  I will show a drawing and the actual framing detail that was finished on site today.  It avoids a lot of messy dropped beams and ugly details that really hurt running ducting later on.

The photos below show the notched costs being placed over the double ply beam.  In photo 2 you can see the space just below the top chord of the joist where it was cut out.  Hangers and blocking are nailed on both sides of the beam, and from below you can see how the cantilever is hanging into space.  This design is extremely effective in this project because we have cantilevers above the front door and also out side side in the same corner area.  The third and fourth photo show this best.  I can't think of a better way to retain structural strength and have dual cantilevers.  Skilled framers make this look easy, but like most construction tasks it only looks easy until you have to try it yourself.

Stairs - the best way to blow the budget on a project

We have installed all kinds of stairs over the past five years, and in my view, the best kind is known as 'integral landing', more on this later (and yes we are using this type of stair on the current job).

For compact inner city jobs like we basically always must build, constraints are a common problem.  The higher we make the ceiling (which we like), the more treads we must add, and this eats horizontal space (we don't like this).  For example it is common to have to squeeze 16 or even 18 risers into a semi detached house that has high ceilings and 14 inch joists.  This can start to really encroach on hallway space or even render rooms unusable.  We can't have that sort of problem so the art of stair design is a really important skill to hire out.

Lacking any kind of stair design or fabrication skill, I turn to my supplier at Built-rite.  Troy is the guy in charge and he knows stairs, that is all they do every day at Built-rite and they have a nice shop on an acreage east of Calgary where they pump out massive volumes of treads.

I had Troy come up with a carriage style closed rise integral landing U shaped three piece assembly for this project.  While that may be a lot of jargon, I think the stairs will be super nice once complete, and that is what is important.  These stairs are one of  many custom touches I am incorporating in this project, while staying on budget and on time (hopefully).

Carriage style refers to the notched stringer, integral landing means the flat landing is connected to the treads (no posts needed), and closed rise means there is not a gap between each tread.  Once installed the upper stairs will have a look of almost being suspended in the air and adds to the open concept feel of my layout.    

The open rise style of tread is significantly more costly to supply and finish, and doesn't add a lot of value to my concept.  This type of U shaped stair does require a lot of railing, and this alone adds a signifiant sum to the budget.  There are far less costly ways to install stairs in a home.  A straight run, as an example, between two studded and drywalled walls would only cost a few hundred dollars to supply and not require much railing either.  A custom staircase and the many finishing details can add tens of thousands to the low cost option.  Here is a photo of the upper piece of my U shaped stair.  The structure is largely 1 inch plywood glued and laminated together.  We can't lift these easily, but fortunately we have a crane booked for next week to load lumber and it will hoist our stairs into position as well.

This is the third piece of the upper floor set, lying on its side in the snow.  We will have to use a hoist to get these hung at the top of the stairwell and braced against the middle wall.  These will be a great custom feature in the semi.

This is the third piece of the upper floor set, lying on its side in the snow.  We will have to use a hoist to get these hung at the top of the stairwell and braced against the middle wall.  These will be a great custom feature in the semi.

Second floor sub-structure

Our framers are back and healthy, and the weather has improved by about 15 degrees C so we are seeing some progress on subfloor two.  The second floor structure is trickier to put on than the main, it features some cantilevers, a stairwell opening in the middle of the building and various notched joists and hanger details.

With continued good weather forecast we may see them try and make up a lost day by working the weekend. That will be a great way to make up for some lost weeks over the holidays.  Here is a photo from the progress today, we will be seeing the floor sheeted and with any luck the stairs hung.


Looks like the joist package is all installed and floor ready to be screwed down.  Filling that large stairwell opening with some stairs will make it a lot easier to get up there (and keep the snow out)

Looks like the joist package is all installed and floor ready to be screwed down.  Filling that large stairwell opening with some stairs will make it a lot easier to get up there (and keep the snow out)

Behind Schedule Already

The flu-sick framers just didn't get better and we spent the entire week short of a full crew.  Today was the first day we had three guys back.  This means we are now a full week behind schedule and this is impacting my next trades that I have booked, from windows and fireplace all the way up to the first of the mechanical trades.

By now we were supposed to be framing the second floor bedroom walls and preparing the site so the trusses could be delivered and craned up on the roof.  I would also be able to plot on my custom staircase on the main and make sure it will work as well as I want it to.  Despite these challenges I suspect the framers will be putting in a big week next week to make up some lost days.

The main floor has turned out quite well, and the evolution of this floorplan has continued to improve via an accumulation of many small tweaks.  A nice feature will be the ceiling height change in the area over the kitchen where it rises from 9ft to 10ft.  

Here are some shots from today when the framers were raising the first of the many joists.


Solving the formerly unanswerable questions related to electric floor heat

Electric in floor heating in the master bathroom is a true luxury feature in an upgraded inner city property.  I like to use the schluter brand system where the heat cable feeds into the ditra underlayment that the tile is installed on. 

The heating cable is about $500, the ditra $3.5/ft and the thermostat can vary between $100-300.  For about $1000 plus some install cost and a dedicated circuit at the panel this upgrade can be included in any new house. 

What was not clear was how much the system costs to operate on a daily or monthly basis. Given that our low electricity costs today are as much fee based as consumption based further confuses the matter.  

By upgrading to a newer touch screen thermostat that is much more feature rich than an earlier model we can now track heated floor energy consumption.   Prior to this I had no way to know how much electricity it would take to hear the tile. 

Using two heat cycles in the morning and late evening, it appears the system is using less than $2 per week. $2 a week for the entire heating season does not seem too bad given how cold the tile floors can feel when the system is off. A consequence of having a skylight in the master bathroom is the room will be colder than if the glass area was smaller.  My advice is to put this system in any new or renovated master bathroom. It is a nice upgrade and appears very cost effective to operate each winter.   It is also a feature impossible to add if the house is finished. 


This is the delux touchscreen thermostat I installed. The other model I removed was programmable but has a very cumbersome interface. This unit is far superior to that one. I used a roughly estimated cost of 5 cents per kWh so the unit can track con…

This is the delux touchscreen thermostat I installed. The other model I removed was programmable but has a very cumbersome interface. This unit is far superior to that one. I used a roughly estimated cost of 5 cents per kWh so the unit can track consumption cost on a daily or even annual basis.